Locking Recovery Points allows you to protect them from merging (deleting) by Retention Policy or manually.
Follow the instructions below to browse file(s)/folder(s) in Recovery Points in Server Backup.
1. Click "Recovery Points" in the Main Menu to open the "Recovery Points" window.
2. In the "Recovery Points" list, select a Server from the drop-down menu located on the "Recovery Points" list toolbar.
3. Select a Disk Safe from the drop-down menu located on the "Recovery Points" list toolbar.
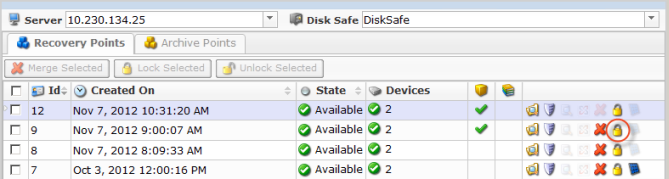
4. In the right top area, find a Recovery Point and click on the "Lock" icon in the "Actions" column for this Recovery Point.
| Tip To find a Recovery Point, you can use the Basic and Advanced List Filters. See Customizing the Recovery Points List. |
| Note You can lock several Recovery Points simultaneously. See below Bulk Locking. |
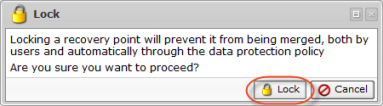
5. Confirm your request to lock the Recovery Point by clicking on "Lock" in the displayed confirmation window.
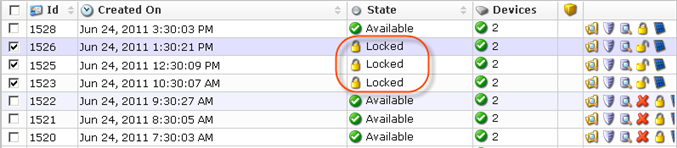
6. You can see the "Locked" state in the "State" column in the "Recovery Points" list.

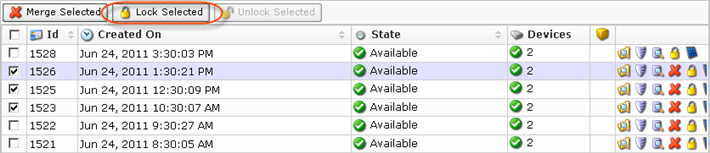
Bulk Locking
Using the "Lock Selected" button, you can lock multiple Recovery Points simultaneously. Follow the instructions below.
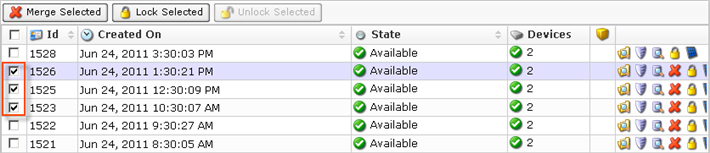
1. Select several Recovery Points by checking check-boxes in the first column in the "Recovery Points" list.
| Tip To find a Recovery Point, you can use the Basic Filter. See Customize the Recovery Points list. |
2. Click on "Lock Selected" located in the "Recovery Points" list toolbar.
3. Confirm your request to lock the Recovery Point by clicking on "Lock" in the displayed confirmation window.
4. Once the "Lock" button has been clicked, the following window appears. Click the "OK" button.

5. You can see the "Locked" state in the "State" column in the "Recovery Points" list.