Disk Safe Compaction enables you to reclaim unused space in the Disk Safe and reorder the data to reduce fragmentation. When compaction is performed, the Disk Safe is copied and compaction routines are completed on the copied Disk Safe. Backup schedules proceed normally, but merges are queued for later. Once compaction is complete, changes from the source Disk Safe are added, and the queued merges of recovery points are processed. The source is switched out for the compacted Disk Safe and is then populated with all your Recovery and Archive points.
In the following illustration, the image on the left represents a Disk Safe before compaction is performed. The image on the right represents the Disk Safe after the compaction is performed and unused space has been reclaimed.

| Compacting the Disk Safe requires an additional copy of the Disk Safe for the duration of the compaction process. Available storage must accommodate this increased usage. In addition, the queued merge tasks may result in a temporary expansion of the Disk Safe size. |
| Notice Because the compaction routines are I/O intensive, only one compaction task should be executed at one time. |
About Disk Safe Compaction
The Disk Safe has a fixed size of 32 KB pages. The pages are indexed using B-Trees and each page is packed with block-level deltas. As you merge old recovery points, some deltas can be discarded.
Deltas can be discarded when merging an old recovery point into a newer one when any one of the following conditions are met:
1. The file system (e.g., NTFS or Ext4) is no longer using the block (you will likely have deleted some files and the associated blocks may not all have been re-used by the O/S).
2. The block has become overwritten (you changed a file).
3. You have re-sized your file system to make it smaller, and the blocks are simply no longer used.
When you merge old or unwanted recovery points, it is normal for the on-disk size of the Disk Safe files to not change or get smaller. Normally, this is not an issue and you can let the Disk Safe manage its on-disk footprint, automatically reusing the freed storage for new block-level deltas.
If you delete a device or disk volume from the Disk Safe, its space is automatically deleted because each disk has its own block-level delta store (.db file). When you delete a disk from the Disk Safe, this file is deleted.
When to Compact a Disk Safe
You may want to consider compacting your Disk Safe if either of the following scenarios apply :
1. The Disk Safe contains a large amount of Free Pages that you must reclaim for use elsewhere.
Free Pages can be seen by selecting Settings -> Disk Safes -> Click ">" next to the Disk Safe to expand -> Statistics tab -> Free Pages
2. Backup task completion times to the Disk Safe have gradually become slower. This is typically observed after hundreds or thousands of recovery points have been stored and merged from the disk safe. This can also occur if a large number of deltas are regularly written and merged out of recovery points. An example of this scenario would include a hosting server where entire user accounts are regularly added and deleted.
A good way to test if compaction will improve performance is to make a new Disk Safe. If backups to the new Disk Safe complete significantly faster than backups to the original Disk Safe, compaction is likely a good way to improve performance of the original Disk Safe.
When either of these scenarios exist, you can use the "Compact Disk Safes" action to shrink the on-disk footprint of the Disk Safe .db files, or to reorder the blocks to reduce fragmentation and improve performance.
When you compact a Disk Safe, the original will remain online while the copy is being created. Replication policies, Remote Replications, and restores will still run, but merges will be queued until the copy operation is complete.
How to Compact Disk Safes
Follow the instructions below to compact a Disk Safe in Server Backup.
1. Click Settings and then Disk Safes in the Main Menu to access the Disk Safes screen.
2. On the Disk Safes screen, find the Disk Safe you need, click the corresponding Actions icon, and select Compact Disk Safe. 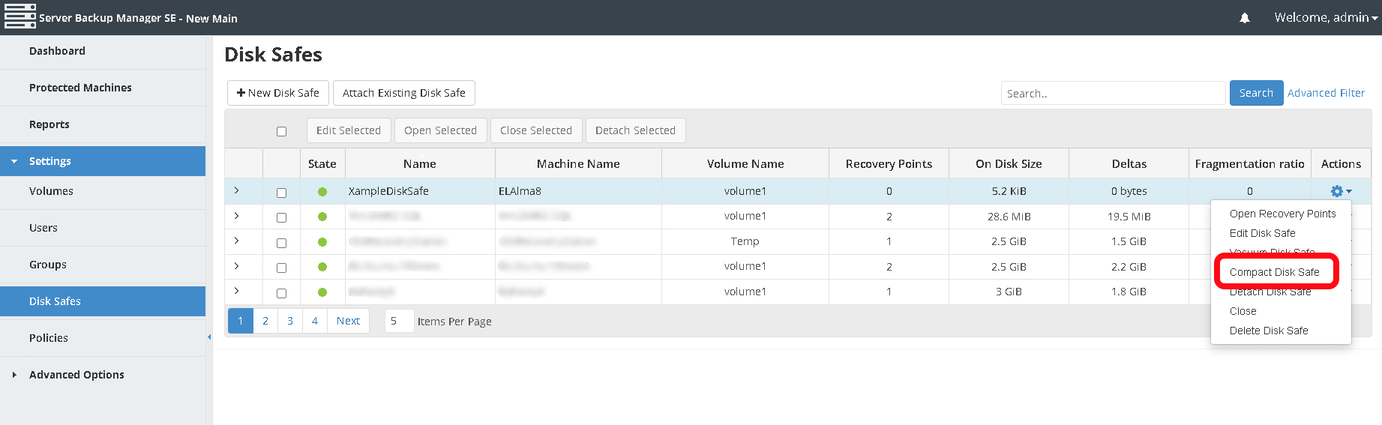
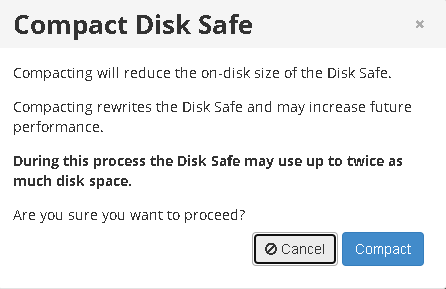
3. A warning window displays. Confirm your request to compact the selected Disk Safe by clicking the Compact button.
4. The Compaction process begins. The Details for Disk Safe Compaction window displays with the compaction process summary. 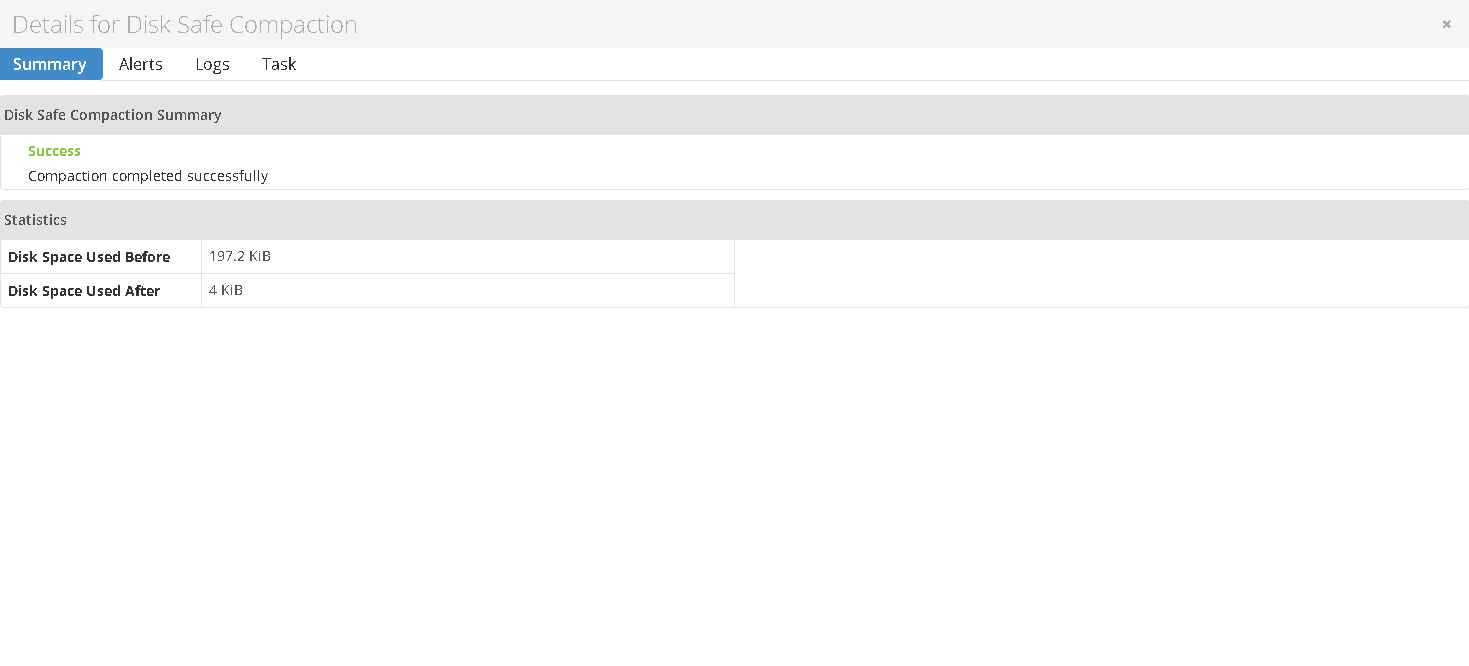
The following tabs can also be accessed in the Details for Disk Safe Compaction window:
- Alerts. Displays compaction alerts.
- Logs. Displays the log messages for the compaction task. You can also download the log messages on this tab using the Download Log Messages button.
- Task. Displays additional compaction task details, such as the task ID, date and time, etc.

Tip
The Task results can be sent via email as a Report. See Reports.