Follow the instructions below to start the Bare-Metal Restore of selected Recovery Points.
| Note The process is the same for all Boot methods:
|
1. Click Protected Machines in the Main Menu to open the Protected Machines screen.
2. For the protected machine you want to restore, click the corresponding Actions menu and select Open Recovery Points.
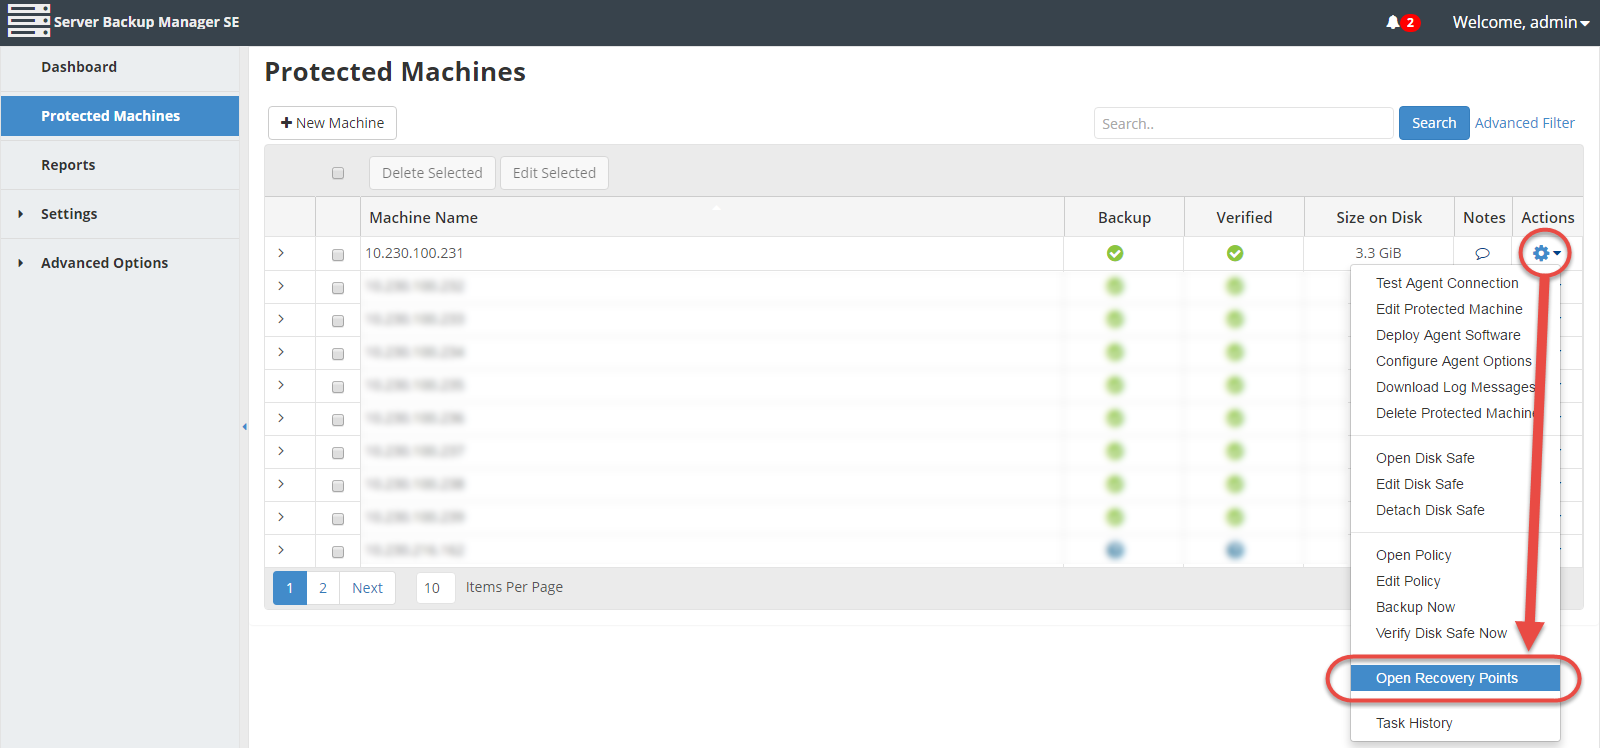
The Recovery Points window for the protected machine displays.
3. Find a recovery point in the Recovery Points window, click the corresponding Actions menu, and select Bare Metal Restore.
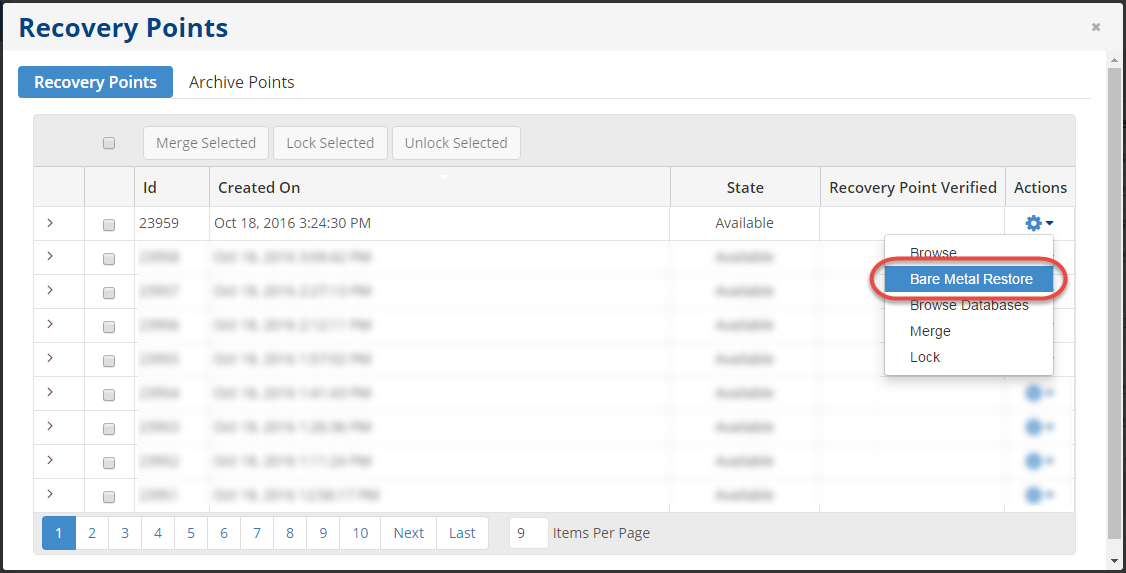
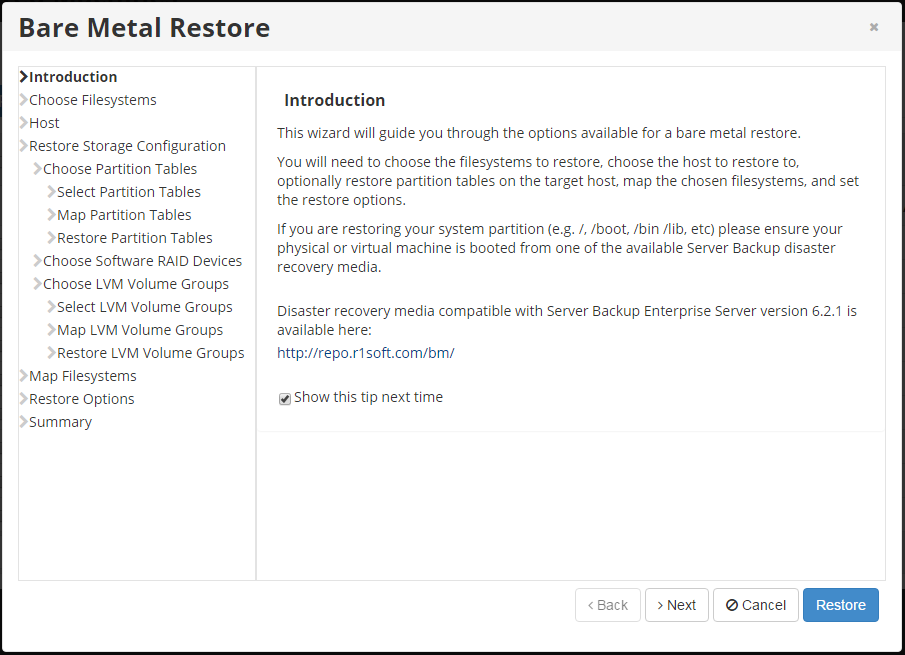
4. The Bare Metal Restore wizard displays. Review the introductory information and click Next to continue.
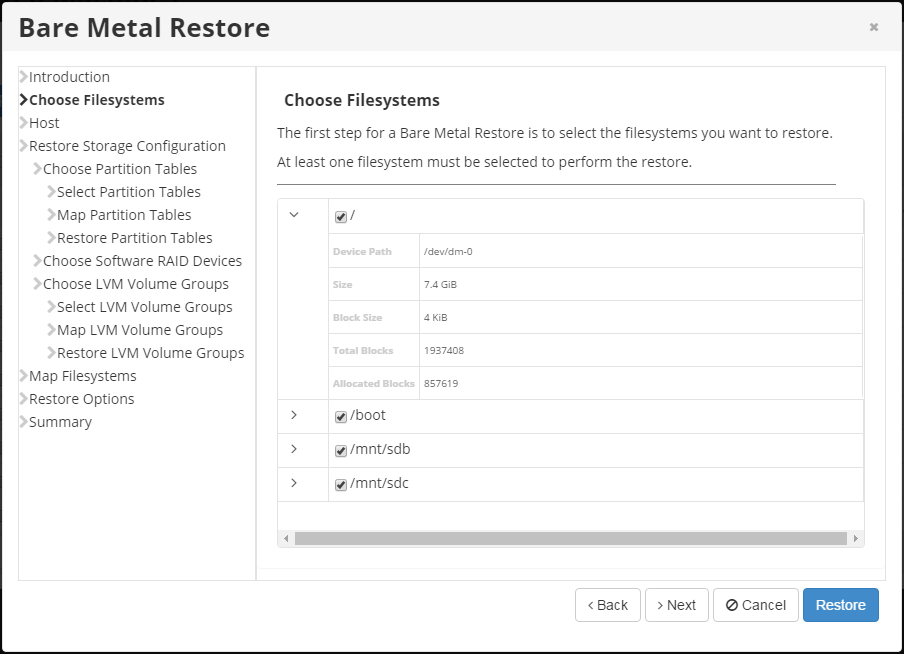
5. The Choose Filesystems screen lists each filesystem and swap device (if Linux) available in the Recovery Point.
Here, you can select the filesystem you want to restore. All available filesystems are listed. At least one must be selected by selecting the corresponding check box.
| Tip To display filesystem properties, click the > icon in front of the filesystem name. The following data is provided for each filesystem:
|
Click Next to proceed.
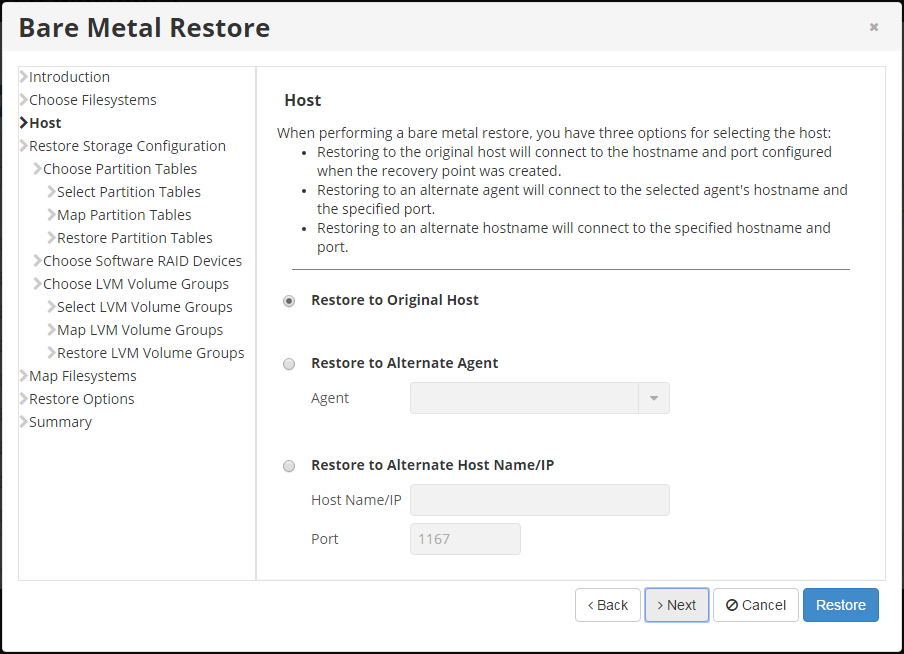
6. On the Host screen, select one of the following options:
- Restore to Original Host - The same Server Name/IP address and port as the original protected machine. Connects to the protected machine name and uses the port configured when the Recovery Point was created.
- Restore to Alternate Agent - Connects to the selected Server hostname and the specified port. The protected machine must have already been added to the system.
- Restore to Alternate Host Name/IP - Connects to the specified Host Name and port. This option allows you to restore to a Host with a Host Name/IP address different than the original Host. For example, if the PXE host has a different IP, specify the IP address.
To restore to the protected machine where the system was installed previously, choose the first option (Restore to Original Host). This is the only option that makes sense when you perform a Bare-Metal Restore using Server Live CD or Server PXE Boot.
If you choose to restore to an alternate protected machine in the system, select the second option (Restore to Alternate Agent). Then select the agent from the drop-down list. The machine to restore must be running the Backup Disaster Recovery Boot Media and should be known to the Backup Manager. When a machine is booted into Disaster Recovery Media, no authentication will be required.
If you choose to restore to an alternate protected machine that is not in the system, select the last option (Restore to Alternate Host Name/IP). Then enter the Host Name or IP address of the alternate machine. This option should be selected when you perform a Bare-Metal Restore using Agent Live CD or Agent PXE Boot.
Click Next to proceed.
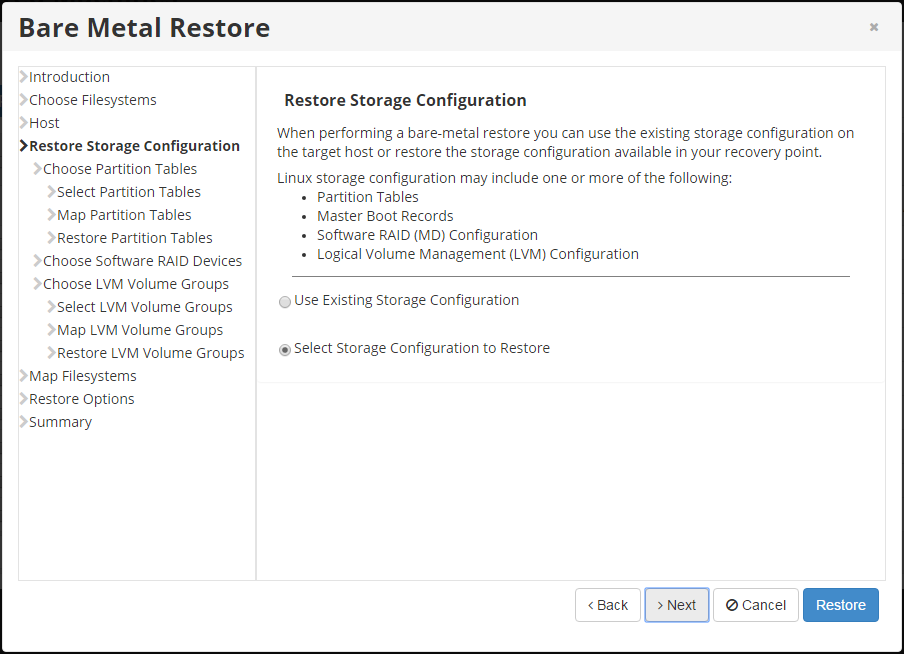
7. On the Restore Storage Configuration screen, select one of the following options:
- Use Existing Storage Configuration - Bare-Metal Restore will use the existing Storage Configuration. This option should almost never be used when performing a Bare-Metal Restore.
- Select Storage Configuration to Restore - Selecting this option lets you pick a Storage Configuration to restore to the target Server. In most cases, you should select this option.
Click Next to proceed.
8. On the Choose Partition Tables screen, select one of the following options:
- Use Existing Partition Tables on Host - Bare-Metal Restore will use the partition layout already present on the target Server. This option should almost never be used when performing a Bare-Metal Restore. However, if you do select this option, click Next and proceed to step 12.
- Select Partition Tables to Restore - Selecting this option lets you pick partition tables from the Recovery Point to restore to the target Server. In most cases, you should select this option.
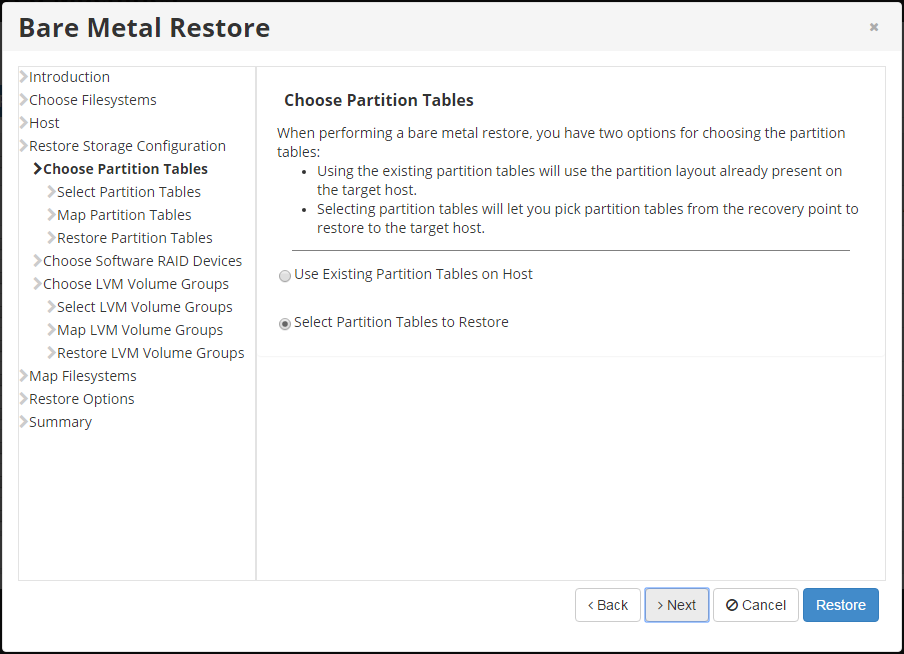
Click Next to proceed.
| Note If you selected the Select Partition Tables to Restore option, three more screens will display:
|
9. On the Select Partition Tables screen, select the partition table layouts for the filesystems you want to restore.
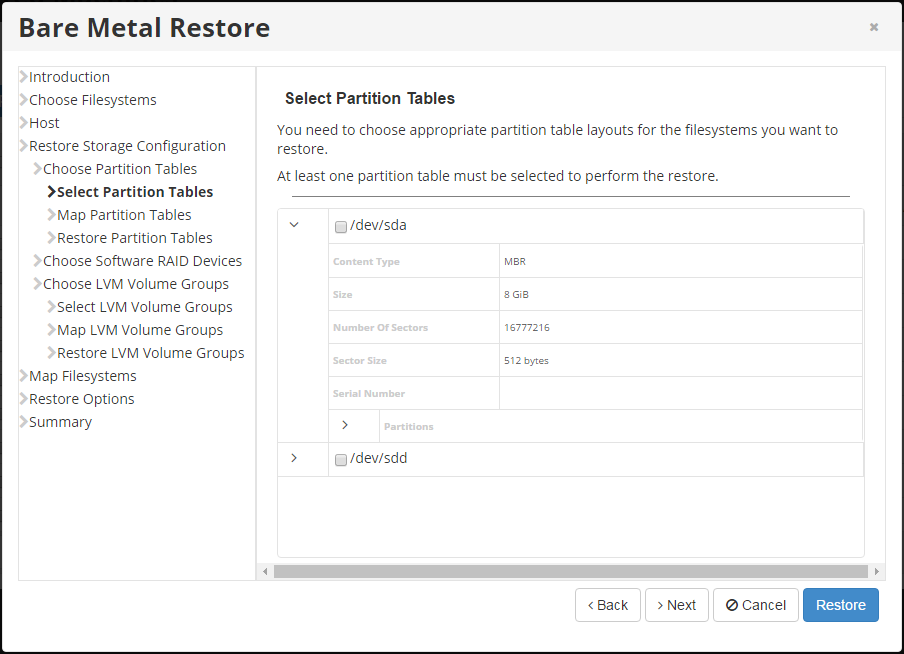
| Tip To display the partition table properties, click the > icon in front of the partition table's name.
|
Click Next to proceed.
10. On the Map Partition Tables screen, map the selected partition table Recovery Points to physical Disks in the Target Server. From the drop-down menu, select the physical Disks to which you are going to restore.
You are provided a table that allows you to map the chosen Partition Tables to physical Disks on the Target Server. You can see as many lines in the table as the number of Partition Tables selected for restore. Each Partition Table must be mapped to a physical Disk on the Target Server before proceeding.
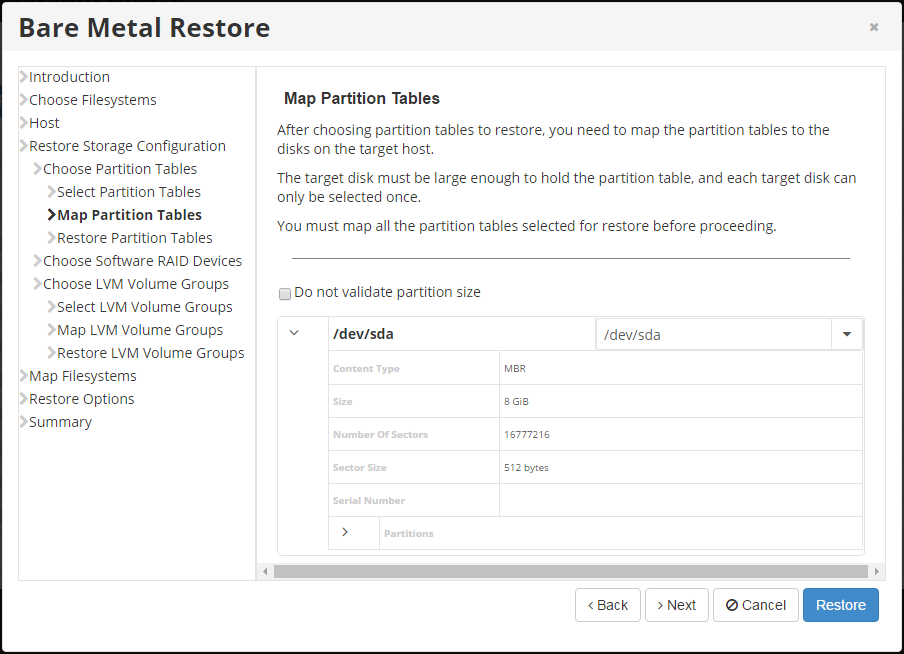
After selecting the Disks, click Next to proceed.
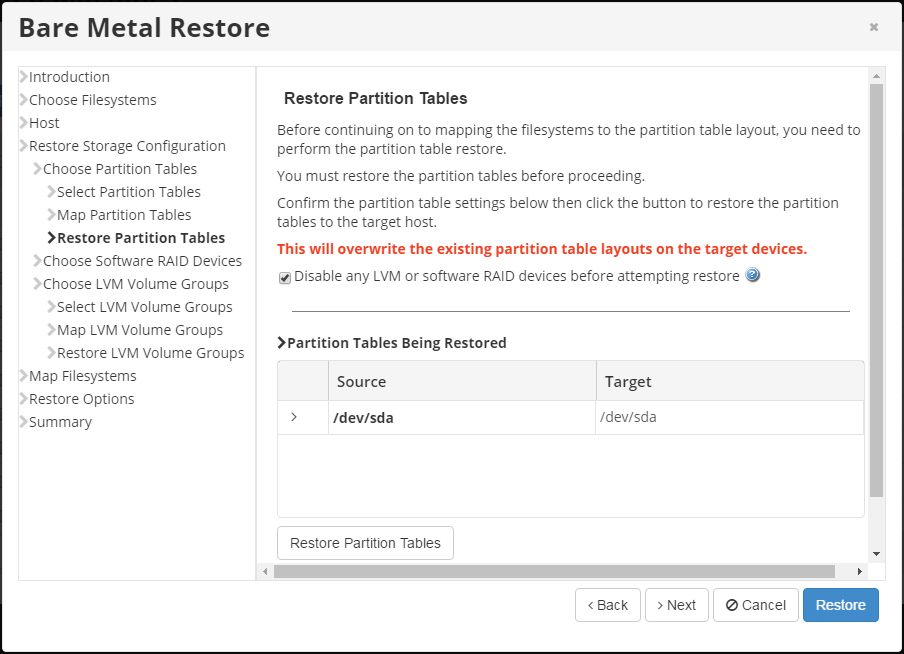
Once confirmed, the Partition Table Restore will be initiated. A busy indicator will be displayed while the restore is in progress. Restoring the partition table should not take a lot of time because the partition table fits into one 512-byte sector. When this process is over, click OK in the notification pop-up.
| Note Restored partition tables will overwrite the existing partition table layout on the target devices. |
Click Next to proceed.
12. On the Choose Software RAID Devices screen, choose one of the following options:
- Use Existing Software RAID Devices on Host
- Select Software RAID Devices to Restore
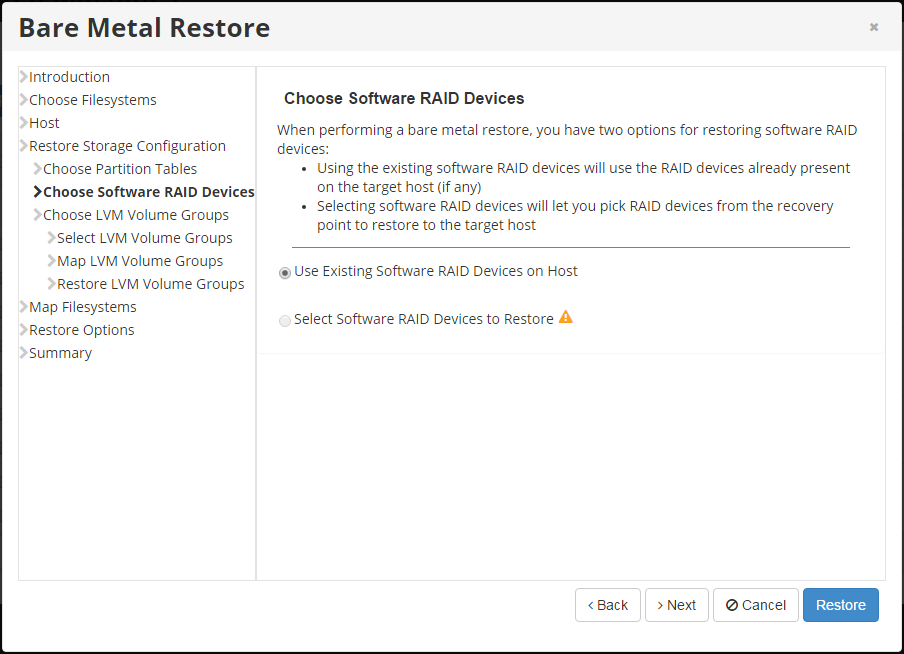
Click Next to proceed.
| Note If you selected the Select Software RAID Devices to Restore option, three more screens will display:
|
13. On the Select Software RAID Devices screen, select the corresponding check box for the devices you want to restore.
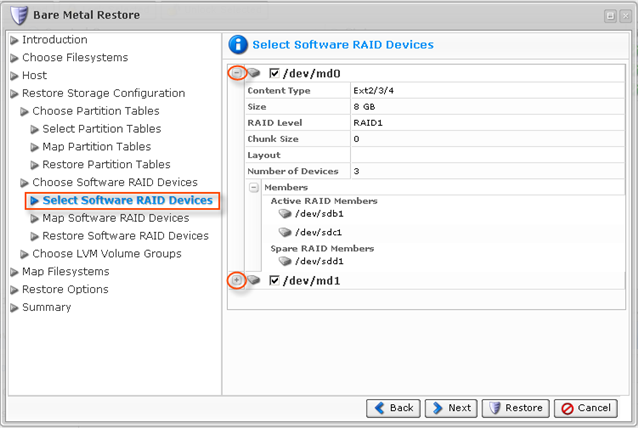
| Tip Click the > to see the details of a Software RAID Device. The following information is available:
|
Click Next to proceed.
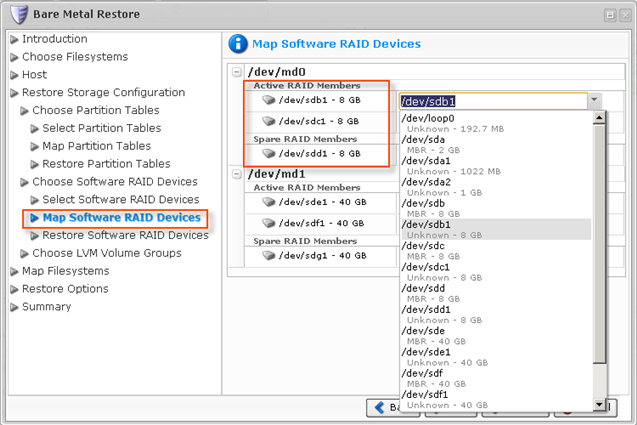
14. On the Map Software RAID Devices screen, select the devices you want to map.
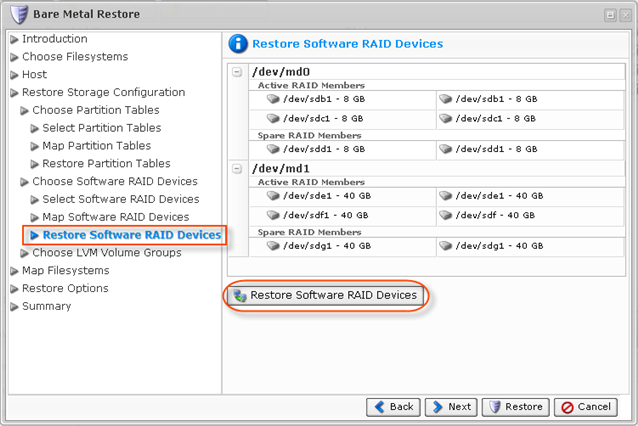
| Notice The mapping of RAID devices is hierarchical. Instead of mapping the actual RAID device (/dev/md0), you should map its active and spare members. |
Click Next to proceed.
15. On the Restore Software RAID Devices screen, review the selected RAID Device information and click the Restore Software RAID Devices button to launch the restore.
Click Next to proceed.
| Note For information on performing Bare-Metal Restore with LVM, click here. |
16. On the Map Filesystems screen, map the chosen filesystems to the devices on the target machine. From the drop-down menu, select the destination devices for each source filesystem.
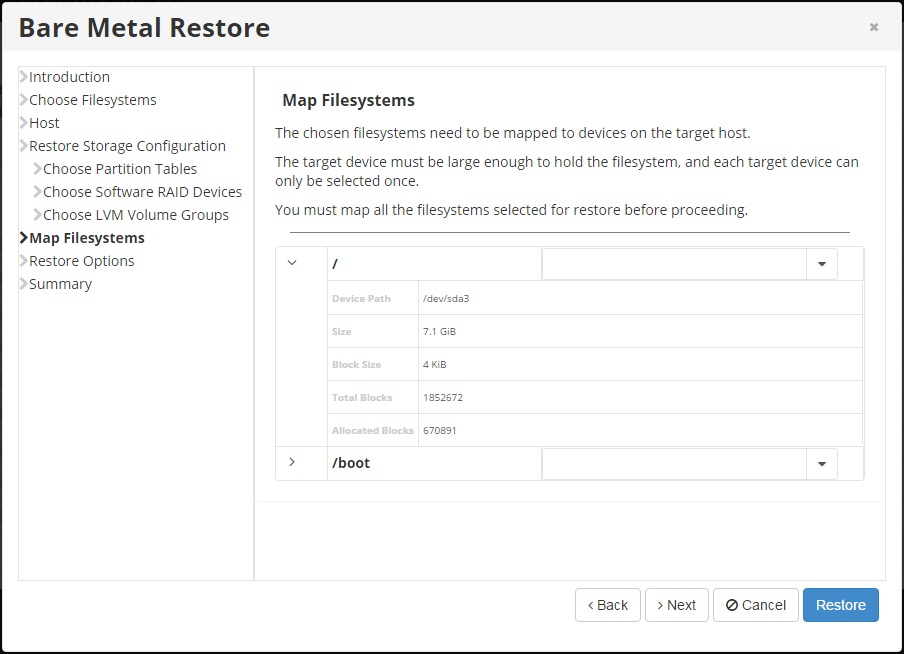
| Notice The target device must be large enough to hold the filesystem. Each target device can only be selected once. |
Click Next to proceed.
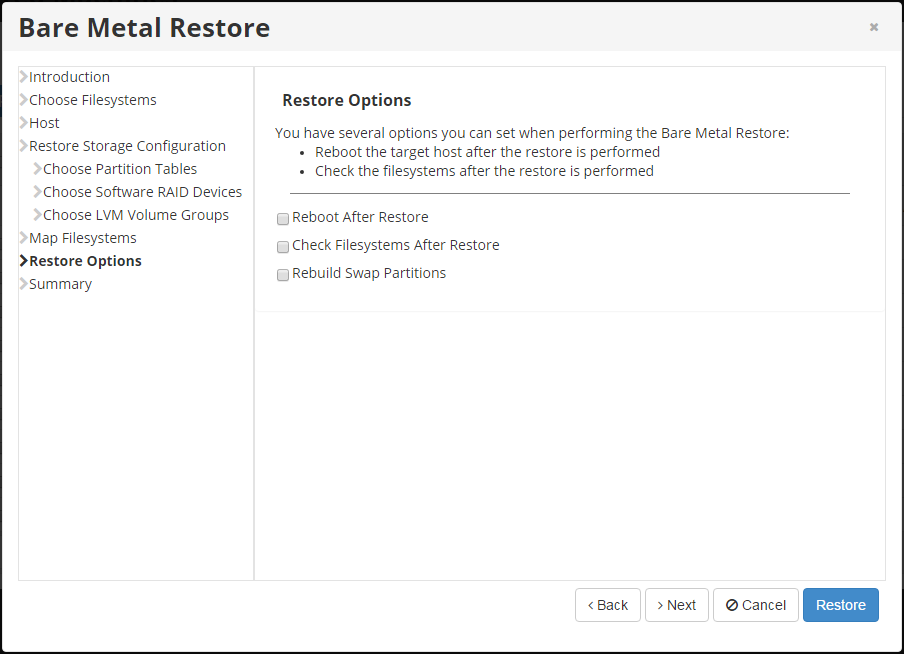
17. On the Restore Options screen, define the following options:
- Reboot After Restore - Select this check box to reboot the target host after the restore is performed. This is a very useful option since you have to reboot the target host after the restore anyway.
- Check Filesystems After Restore - Select this check box to check the filesystems after the restore is performed.
- Rebuild Swap Partitions - Select this check box to rebuild the swap partitions.
Click Next to proceed.
18. On the Summary screen, review and confirm your selected Bare-Metal Restore options. Each selected filesystem is listed, along with the name of the target device to which it is being mapped.
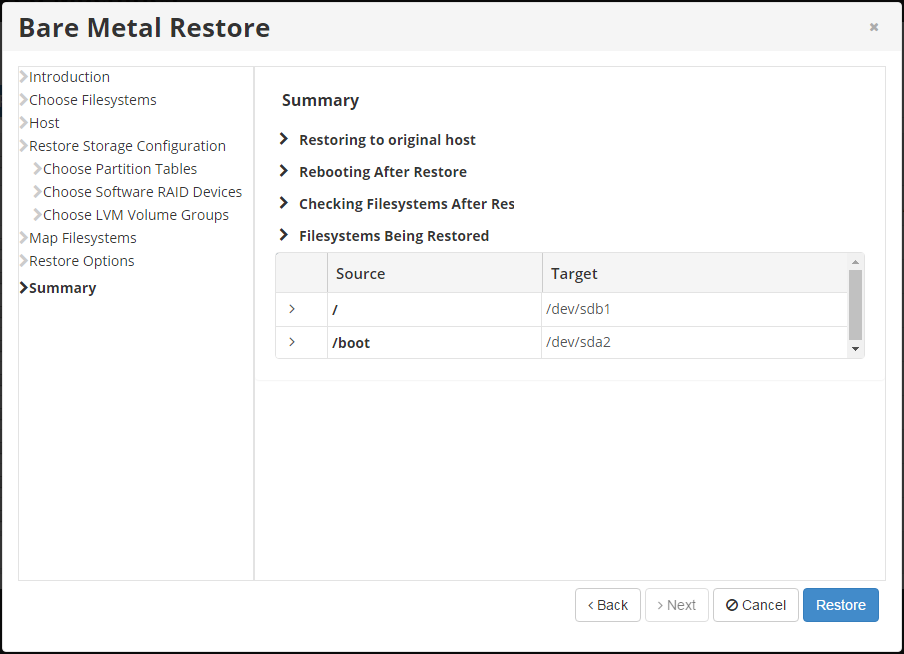
19. Click Restore to start the Bare-Metal Restore task.
The data restore is initiated. Click OK in the "Restore scheduled" pop-up message.
| Tip The Task results can be sent via email as a Report. |
The Restore process starts and can take a while. You can go to the "Task History" screen to observe the task progress. See Access Task History.
The Task History page displays the State, Alert, Type, Progress percentage, and the Started time stamp of the Bare-Metal Restore process.
| Note You can find more information about the Restore process by reading the Log Messages. The Log Messages for the selected Task are displayed at the bottom of the page. |
20. When the process is complete, you can reboot the Server you just restored by pressing <Ctrl><Alt><Del> or by executing the reboot command in the root shell.
| Notice Make sure you eject the Disk from the CD-ROM drive so the Server will boot from the hard Disk. If the Disk you used for your Bare-Metal Restore is larger than the Disk you backed up previously, the free space on the new Disk will remain free. You can create a new Partition in this space. |

