Disk Safe Verification is targeted at detecting and alerting the user in the event of any possible corruption in a Disk Safe. Disk Safe Verification (DSV) runs on a separate schedule for each Policy to occasionally inspect the Disk Safe for any signs of corruption.
Once the Disk Safe Verification procedure has been started, you will see DSV tasks in the Task History. The default DSV schedules should be appropriate for most users, but in some cases, DSV tasks will need to be run more or less frequently depending on factors that may, for example, include the following:
- How busy the Backup Manager server is (i.e., how many servers it is backing up)
- How important it is to ensure that no possible corruption has taken place
When run, DSV will hash and compare block data in the Disk Safe to the hashes that were stored for the block data when written to the Disk Safe. If the hashes no longer match, the data has been altered/corrupted, and an alert will be created in the Policy to inform the user. If a Disk Safe Verification task detects corruption, the Backup Agent will run a full block scan to verify every possible changed block and will send back any changed blocks. This will ensure that there is a full, consistent Recovery Point in the Disk Safe after the very next backup following the detection of an issue in the Disk Safe.
It is recommended to carefully consider the necessity of being able to restore data from a particular server, and to ensure that the DSV schedule is set accordingly. On business-critical servers, a slightly more frequent DSV schedule may be appropriate, and on a web server, for example, the DSV schedule frequency may be reduced pretty significantly. It is also possible to disable DSV for a Disk Safe entirely, but it is not recommend to do so.
Follow the instructions below to schedule a Disk Safe Verification.
1. In the Main menu, click Settings and then Policies.
2. On the Policies screen, click the + New Policy button to add a new policy.
or
To edit the schedule for an existing policy, click the corresponding Actions icon and click Edit Policy. 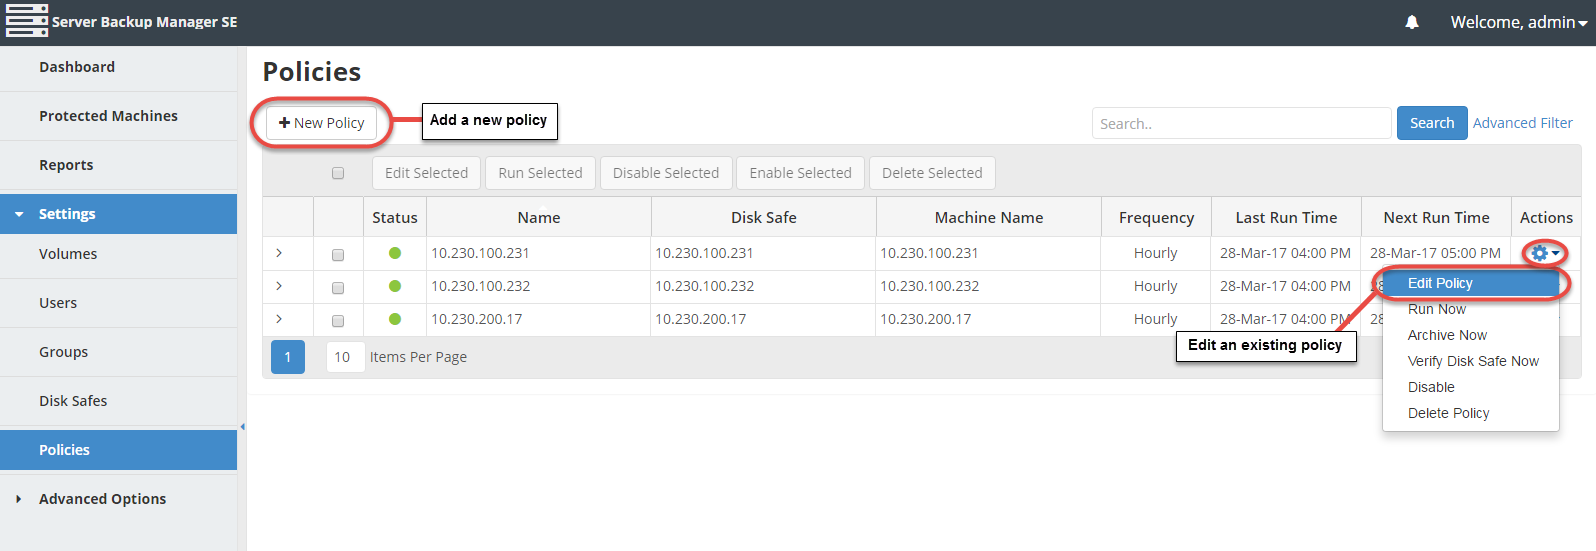
The Create New Policy/Edit Policy window displays. The fields are identical in each of these windows.
3. In the Create/Edit Policy window, select the Advanced Policy Settings tab and click the Edit Schedule button in the Disk Safe Verification Schedule section. 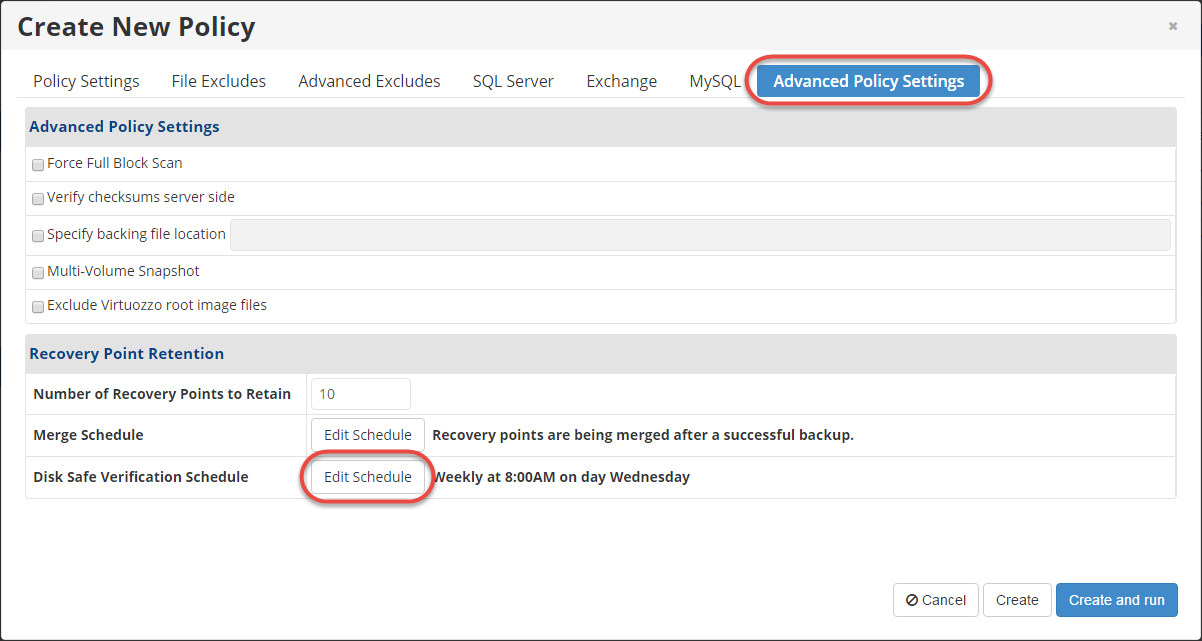
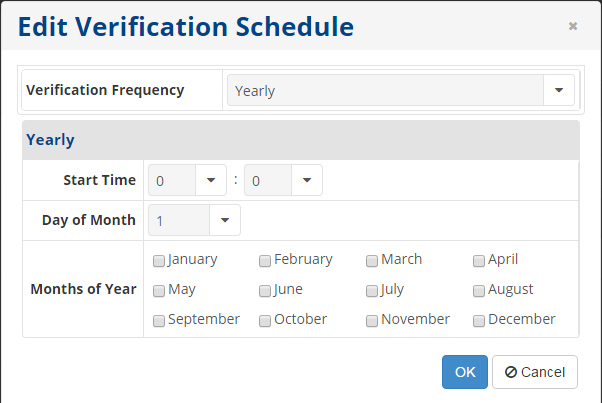
The Edit Verification Schedule window displays.
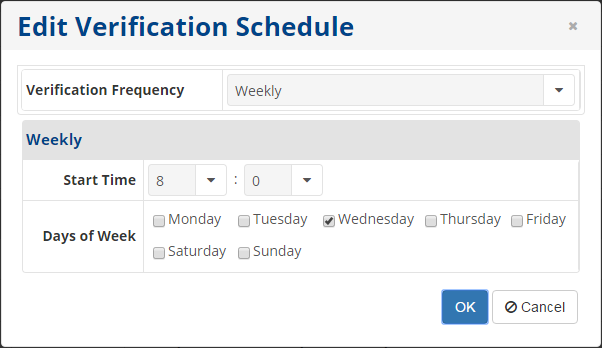
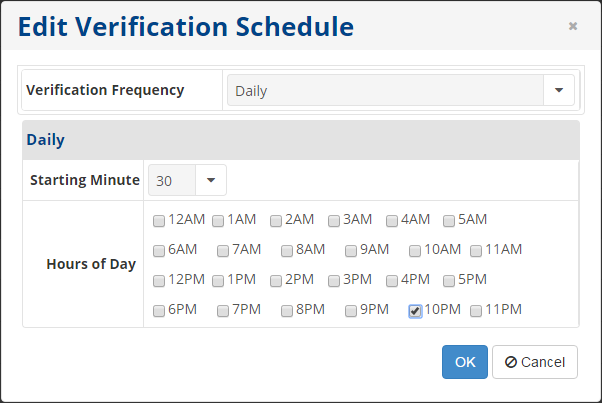
4. In this window, you can define the frequency and start time for the Disk Safe verification. There are five options available in the Verification Frequency field: On Demand, Daily, Weekly, Monthly, and Yearly. You can set the specific time for the verification process depending on the selected trigger.
- On Demand - The verification will not start automatically. You can run the Disk Safe verification manually at any desired time.
- Daily - The verification runs on a daily schedule. You can select the starting minute and hour in the corresponding fields. The verification will be launched every day at that time.
- Weekly - The verification runs on a weekly schedule. You can select the start time and days in the corresponding fields. The verification will be launched every week at that time. (Refer to the screenshot at the beginning of Step 4 for an example of a Weekly schedule.)
- Monthly - The verification runs on a monthly schedule. You can select the start time and the exact days of the month in the corresponding fields. The verification will be launched at that time.

- Yearly - The verification runs on a yearly schedule. Select the start time and months of the year in the corresponding fields.
5. Click OK to apply the settings. The Disk Safe verification schedule is set.