There are three ways for you to restore or access Control Panel users files:
- Restore selected files to their original location. See Restoring Your Control Panel Account.
- Download files to local computer and upload files via FTP to web site (control panel home). See Downloading Control Panel Users' Data as Archive.
- Send a TAR or ZIP containing selected or all files to control panel home directory. See
This topic describes the third option. Follow the instructions below to send Control Panel Users' data as an archive file to the CDP Agent home directory.
| Tip The instructions are for CDP administrators. |
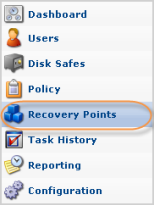
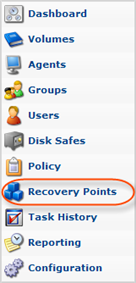
1. Click on "Recovery Points" in the Main Menu to open the "Recovery Points" window.
| Advanced Edition | Enterprise Edition |
|---|---|
 |
 |
2. Make sure the "Recovery Points" tab is selected.
3. Enterprise Edition: In the "Recovery Points" list, select an Agent from the drop-down menu located on the "Recovery Points" list toolbar.
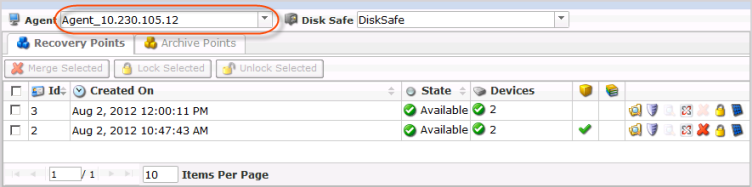
4. Select a Disk Safe from the drop-down menu located on the "Recovery Points" list toolbar.
| Advanced Edition | 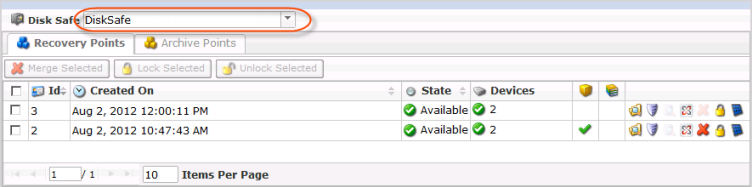 |
|---|---|
| Enterprise Edition | 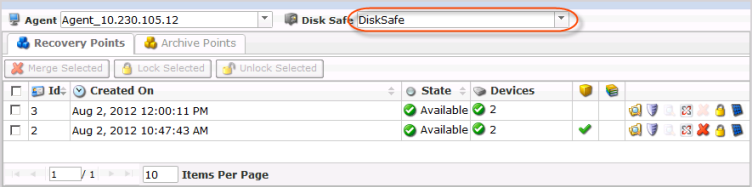 |
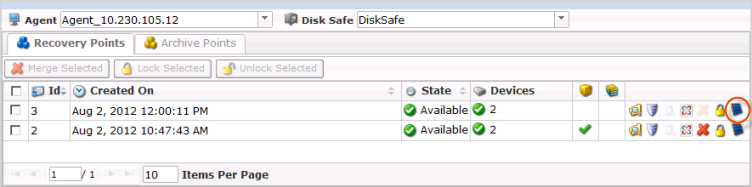
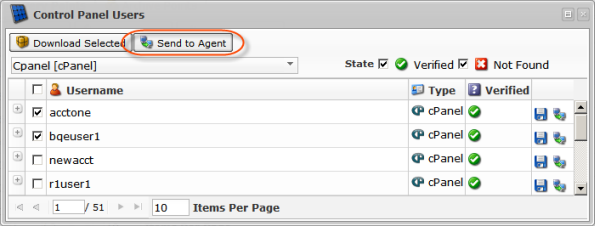
5. Click on the "Control Panel Users" icon of a certain Recovery Point.
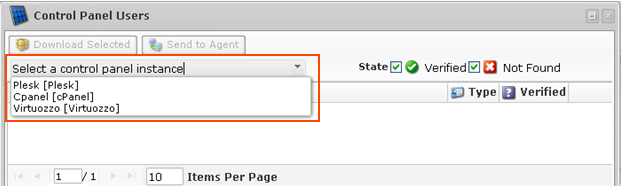
6. A "Control Panel Users" window appears. Select a Control Panel Instance in the drop-down menu.
7. Find the username you want to restore in the "Control Panel Users" list and click on the "Send to Agent" icon in the "Actions" column to send the archive containg the Control Panel Users' data to the Agent.
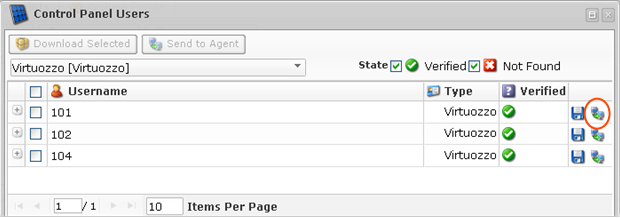
| Note You can also use the "Send to Agent" function. See Bulk Restoring below. |
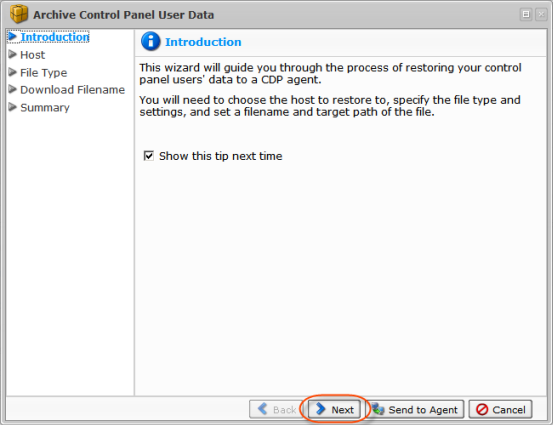
8. The "Archive Control Panel User Data" window will appear. Familiarize yourself with the introductory information and click "Next" to proceed with adding the instance.
9. On the following "Host" screen you have three (3) options for selecting the host:
- Restore to Original Host - Connects to the Agent's current hostname and port.
- Restore to Alternate Agent - Connects to the selected Agent's hostname and port.
- Agent - Allows you to choose an alternate agent.
- Restore to Alternate Host Name/IP - Connects to the specified hostname and port.
- Host Name/IP - Allows you to define the specified Host Name/IP.
- Port - Allows you to define the specified Port.
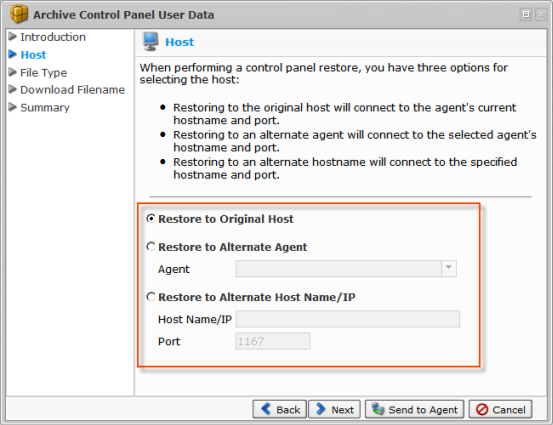
Click "Next."

10. On the next "File Type" screen select the File Type of the future file.
Next options are available:
- Restore files as a tar - Allows you to archive and download control panel users' data as a .tar file. More preferentially for users hosted on Linux servers.
- Compress tar file with gzip - Allows you to compress tar archive with .gzip compression.
- Restore files as a zip - Allows you to archive and download control panel users' data as a .zip file. More preferentially for users hosted on Windows servers.
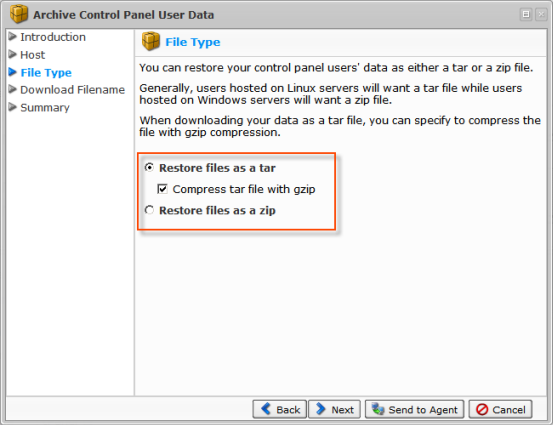
Click "Next."
11. On the next "Download Filename" screen define filename for the archive file.
Next options are available:
- Use Generated Filename - Allows you to generate Archive Filename automatically. It will consist of:
- Generic prefix
- The date the recovery point was created on
- Specify Filename - Allows you to define your own Archive Filename.

Note
You do not need to specify the extension of the file. It will be appended automatically. - Target Path - Allows you to define a destination to backup to.
Note
The path must be absolute and formatted correctly for the target host's operating system. - Overwrite Existing File - Allows you to choose whether or not to overwrite the archive file if it already exists.
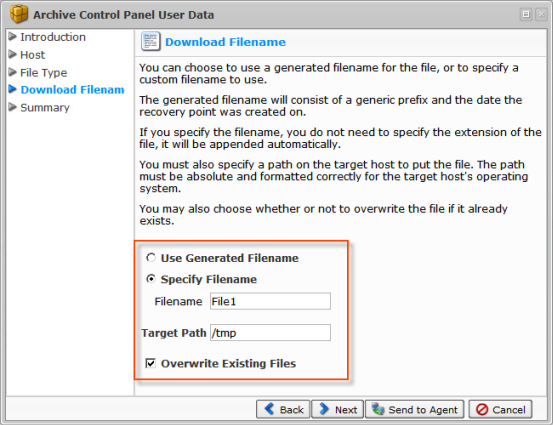
Click "Next."
12. On the last "Summary" screen, the settings you have selected are listed.
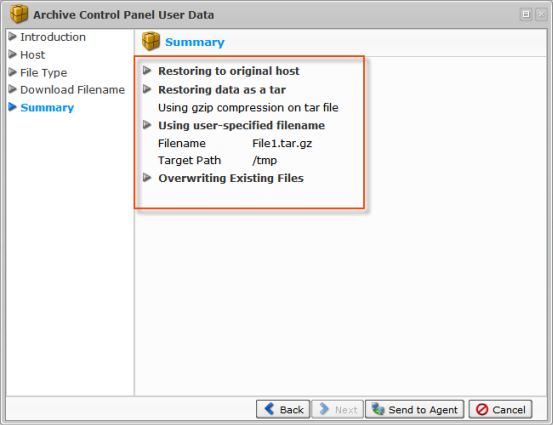
13. Once you have verified that the specified settings are correct, click the "Send to Agent" button to restore Control Panel Users' data as an archive file.

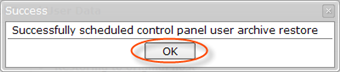
14. Click "OK" in the "Success" window.
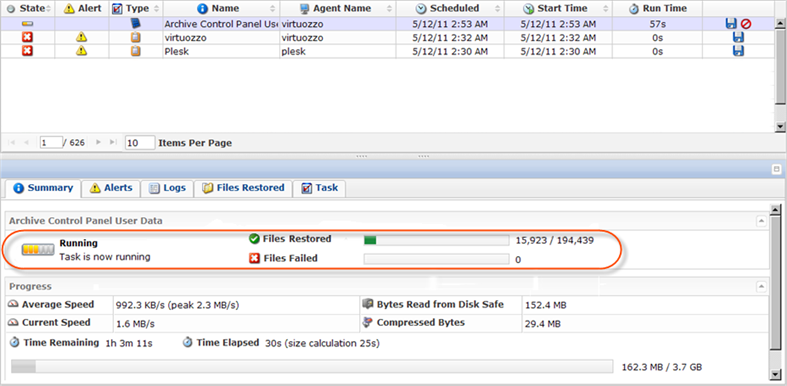
15. In the Task History you can see the process of restoring (see Accessing Task History).
Bulk Restoring
Using the Bulk Restoring, you can restore the data of multiple Users at once. All the data will be restored in one file with specified filename, file archive type, and archive settings. Follow the instructions below.
1. Select several Users by selecting the checkboxes in the first column in the "Control Panel Users" list.
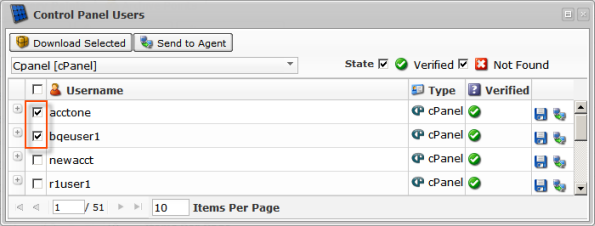
2. Click on "Send Archive to Agent" located in the "Control Panel Users" list toolbar.
3. The "Archive Control Panel User Data" window will appear. The following steps are the same as while restoring individual user account (see above).
4. Once the user accounts restore has been scheduled, you can see the process of restoring in the Task History (see Task History).